There are lots of ways to build a digital picture frame. So far I have built three. Method #1My first digital picture frame was built from an old laptop. (Which was already old in 2007, when I built it.) Basically you just take it apart and remove as many parts as you can, including battery, plastic parts, floppy, cdrom, keyboard (if it will boot without it), etc. Then you fold the screen around the back of the laptop and find a way to mount it in a picture frame. The nice part about this is that the laptop is an all-in-one thing, and you might already have one collecting dust in a closet somewhere. The not-so-nice part is the software, each laptop is it's own little galaxy of pseudo-supported hardware, so good luck with that. :) This is what that first picture frame looked like from the back: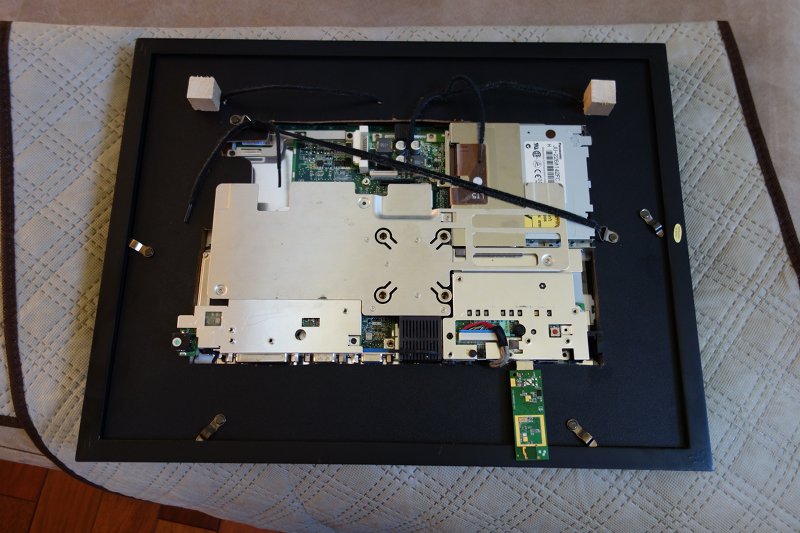 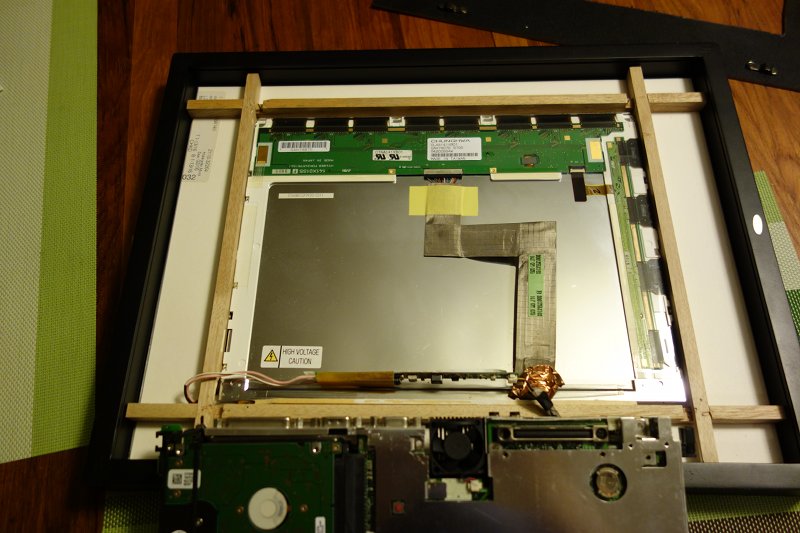 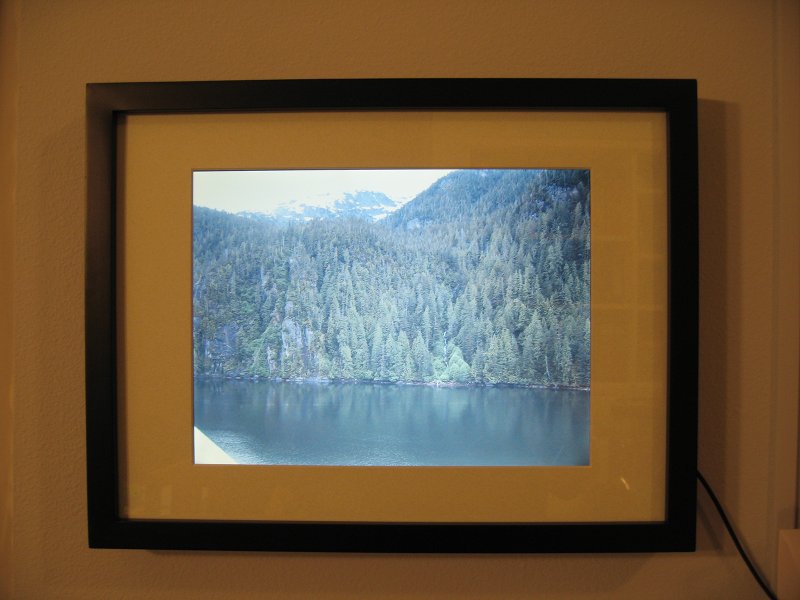 Method #2The second frame I build was built around wood frame made of 1-by-2's. The food frame holds the monitor panel, and hangs on the wall. Originally, I used an industrial Intel motherboard for this, which worked really well, but after I wrote pi-ctureframe, I replaced it with a raspberry pi. The raspberry pi is basically taped to the back of the panel. The wood frame then hangs on the wall, and a standard picture frame is then hung in front of the panel. Here is what it looks like from the back: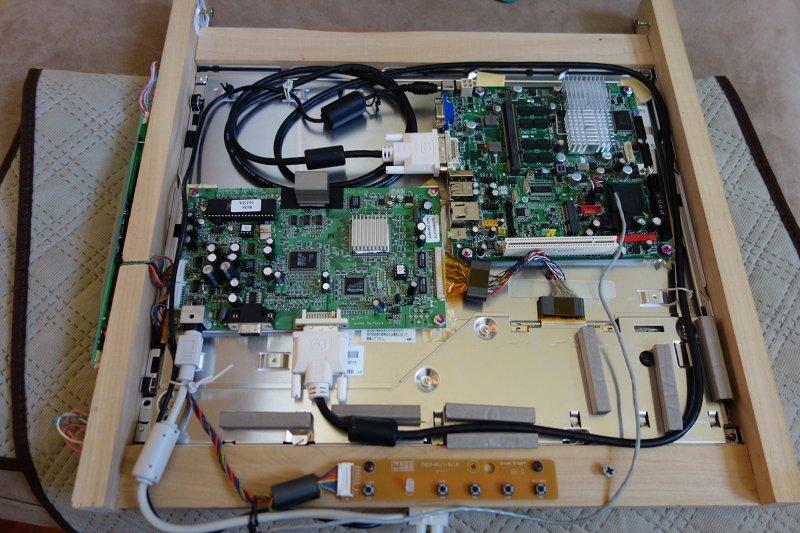 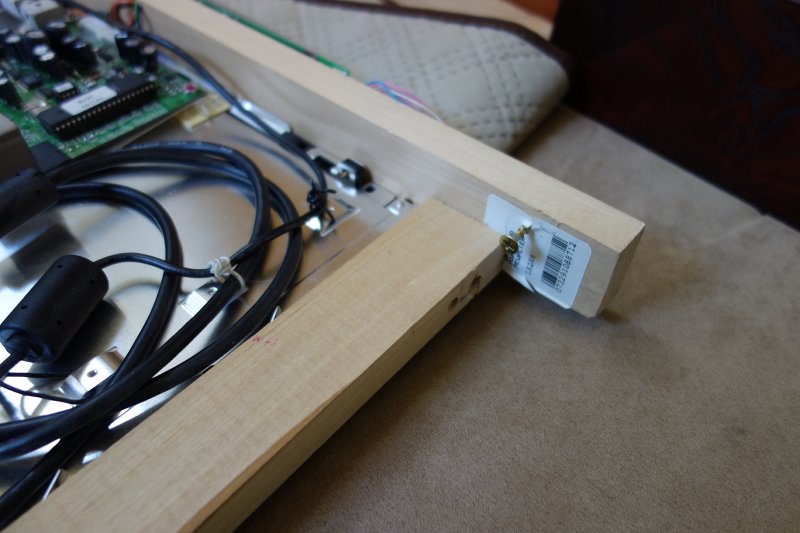 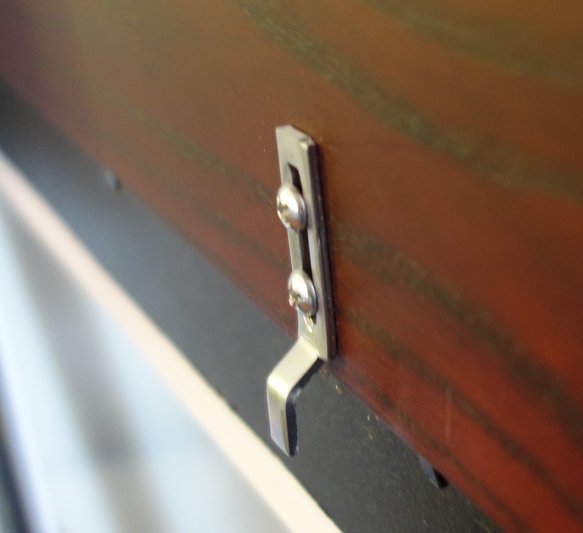 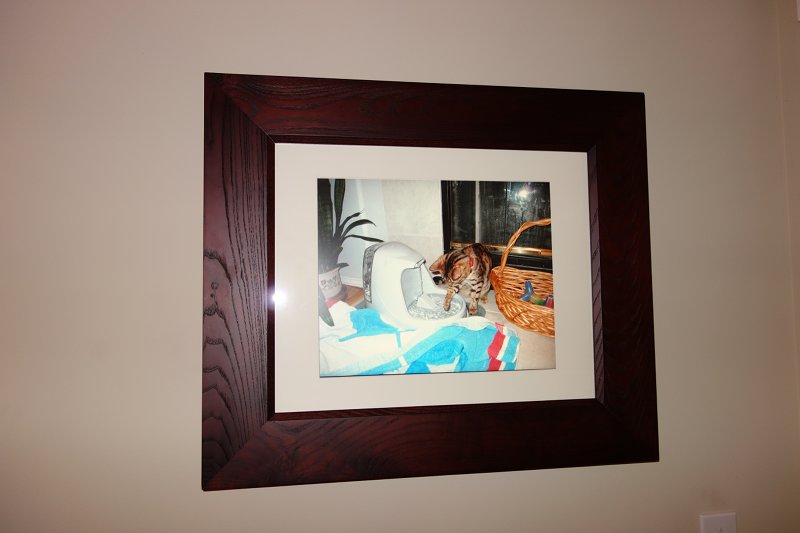 Method #3My third frame was build using 3d-printed framing fingers. This is by far my preferred method as it can easily be adapted to any monitor or panel, and requires the least amount of hands-on work. Here is what it looks like from the back: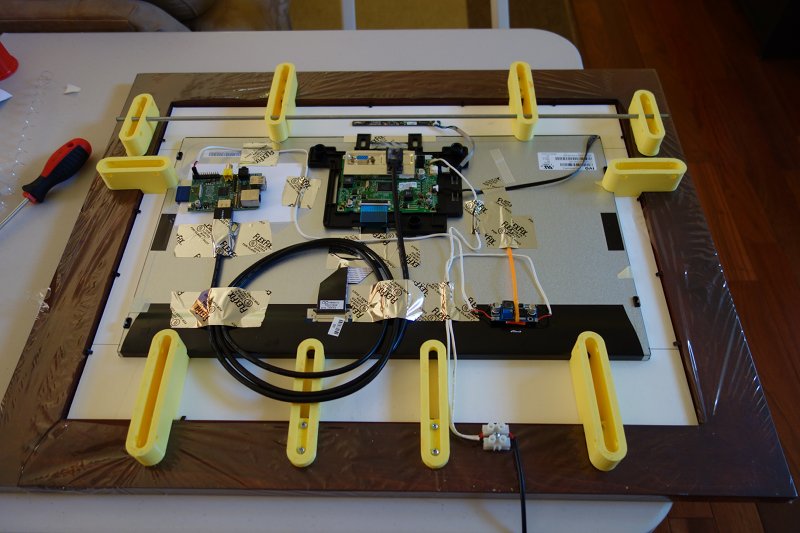 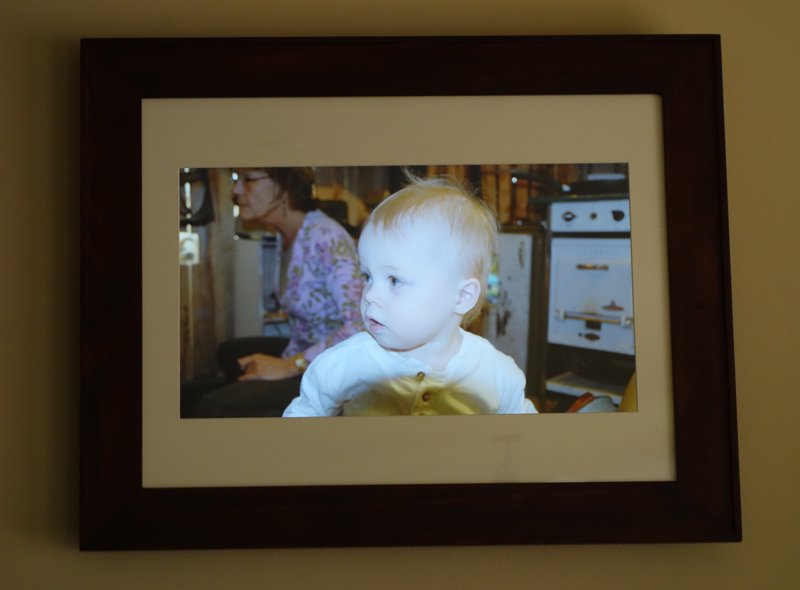 Getting the right monitorGetting the right monitor for building a digital picture frame is not easy. Almost all monitors on the market has a 16:9 aspect, and most digital cameras takes pictures that are 4:3 or 3:2. This means that you either have to crop your pictures a lot, or you end up with black bars on the side of your pictures. My software does a little of both, it crops pictures up to a specified percentage, and fills out the rest with black bars. However, if you can find a monitor that is is not wide-screen, it will look a lot better. A 21-inch 3:2 monitor would be perfect, but I'm not aware of any such monitor on the market.Additionally, you really want a monitor with a decent view angle. Unfortunately, many monitors have decent view angles only to the left and right, but your picture frame may and up hanging higher or lower than normal head height. For the last picture frame I built, I noticed that the picture looked funny when viewed from below the frame, so I mounted the panel upside down. There are options in /boot/config.txt that lets you rotate the picture back if you need to do something like this. You really want a panel that is as thin as possible. Unfortunately, many monitors have connectors that stick straight out the back of the monitor, which really makes it hard to mount it close to a wall. An angled hdmi cable might help, but a monitor that has the connectors going down is probably going to be a better choice. I prefer monitors that have external power bricks. What I usually do is that I upgrade the power brick to a more powerful one (but same voltage) and then I use a step-down converter to power the raspberry pi from the same power brick. That way I can have only one power cable, which seems cleaner to me. (Even though it really doesn't matter if the cables are hidden inside the wall anyways..) Don't forget that TV's are also LCD panels, sometimes TVs are cheaper than computer monitors. Beware that some smaller TVs have 720p native resolution, which isn't very good for a digital picture frame. SoftwareFor a long time, I was using Linux+X11 and some scripts to load images, but the raspberry pi has such nice support for OpenGL ES 2, that I decided to write some new software in C++. This software is called pi-ctureframe and is available here. Once you download it, just untar on your raspberry pi and compile it: (These instructions were written for raspbian, but may work on other distributions as well.)sudo apt-get install libexif-dev libjpeg-devPi-ctureframe will load pictures from one or more directories, scale them using a high-quality scaler and display a slideshow with nice OpenGL-based transitions. It will also open a web server on port 80 that you can use to rotate pictures and give it a thumbs up/down, here is a screenshot: 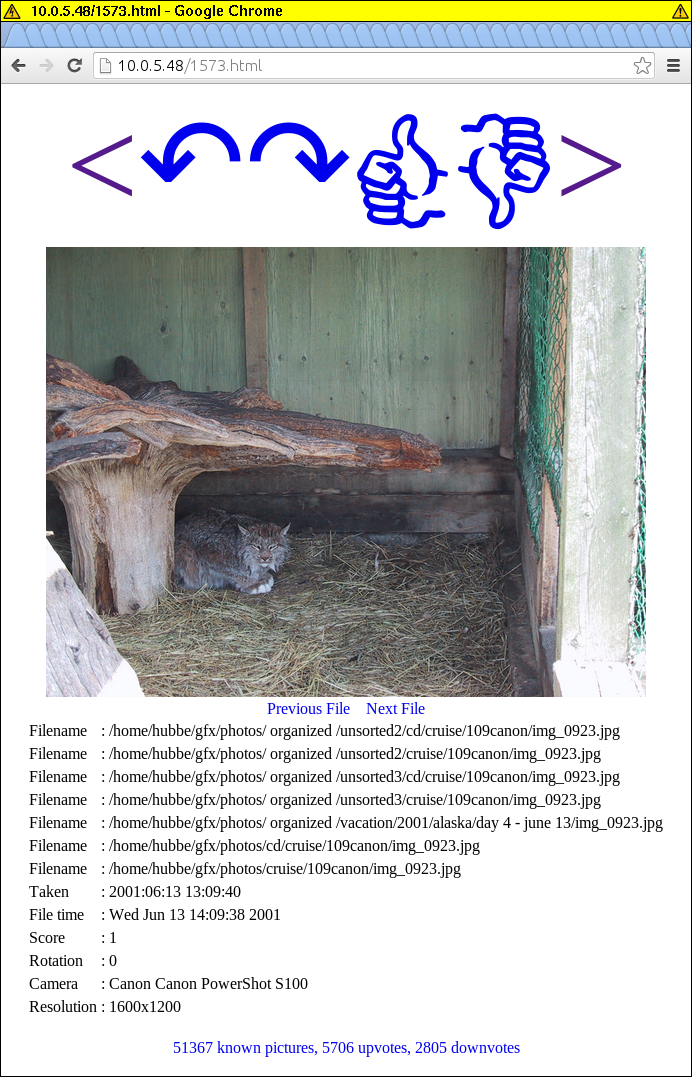 As you can see, there are lots of filenames listed for this picture, this is because pi-ctureframe will scan all your pictures and if some of them are identical, it will treat them as a single picture. This means that even if you have a million copies of the same image, it will not show up more often than other pictures, and thumbs up/down and rotation will be applied to all the copies of the image. Setting up your raspberry piAfter you download and install raspbian, there are still a few things you need to do, like aking pi-ctureframe run automatically:echo >>/etc/rc.local '/usr/local/bin/pi-ctureframe --metadata_dir=/net/pictures/metadata_dir /net/pictures/pictures &'If you have a 256Mb raspberry pi, you might want to free up some memory by uninstalling some things: apt-get remove consolekit dbus triggerhappyIn general, the picture tends to be more stable if you add this option to /boot/config.txt: config_hdmi_boost=4Also you should probably turn off swap, as pi-ctureframe runs fine without it, and it will just end up aging your sdcard prematurely: echo CONF_SWAPSIZE=0 >/etc/dphys-swapfileI have my pictures on a NFS server, so I add these lines to /etc/fstab: mkdir -p /net/picturesI had some problems with using NFSv3 (raspberry crashed) but when I added vers=2, it worked better. If your pictures are on a windows/samba share, you'll need something like this instead: mkdir -p /net/picturesYou might also want to configure mDNS on your raspberry pi so that you can access the webserver with an easy-to-remember name. (I just use IP numbers myself. :) My file server hosts a small html file which contains links to all the devices and stuff in the house, which makes everything easy to find. And that's it! Note that if you have multiple picture frames that uses pi-ctureframe, you should make sure that the metadata dir is also on the file server, and not on local disk so that when you rotate an image or give it a thumbs up/down, all the frames will benefit. Hanging the picture frameSince a digital picture frame is fairly heavy, I don't recommend hanging them from one hook. However, hanging it from two (or more) hooks can make levelling a nightmare. I like using this type of hook, that can be adjusted after you nail it to the wall: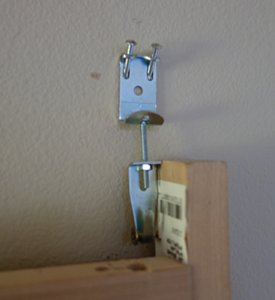 Power and other cablesSo, unfortunately, a contraption like this doesn't run on batteries, so you're going to need at least one cable going to the picture frame. If you can, you probably want to thread that cable through the wall. Kits for wall-mounted TVs should work fine. Now, if you can thread cables through the wall, you have lots of options for where you put your electronics. Perhaps the simplest option is to just string the HDMI/DVI cable through the wall and hide all the electronics wherever the cable comes out. This way you could hook up whatever computer you want to the monitor. Personally, I prefer to keep as much as possible contained behind the picture frame itself. However, when I attach the raspberry pi to the back of the frame, I've solved one problem and created two new ones: network and power for the raspberry pi. For network, an Ethernet cable is always going to be my first choice, but if that is not an option, a wifi adapter will work too. Just beware that RTl8192cu-based ones can be really slow, one of these is much faster for me.As for power, I like getting a monitor with an external power brick. I then buy a more powerful power brick, with the same voltage, and cut off the connectors from both power bricks. Then I use the new power brick, the old power connector and a few feet of wire to extend the power cord as far as needed. I like using the little screw connectors you see in the pictures (sorry, but I have no idea what they are called.) because it's easier to thread cables though a wall if there are no connectors on the cable. Problems? Questions? Suggestions? Send me an email. Last modified: December 23rd, 2013 - Design by Monica & Fredrik Hübinette |
|||||||||||
