 |
 |
 |
 |

back
|
Teensy Saber Electronics V2
|

|
DIY Teensy based lightsaber

Download TeensySaber 2.2 KiCad files here.
What you will need:
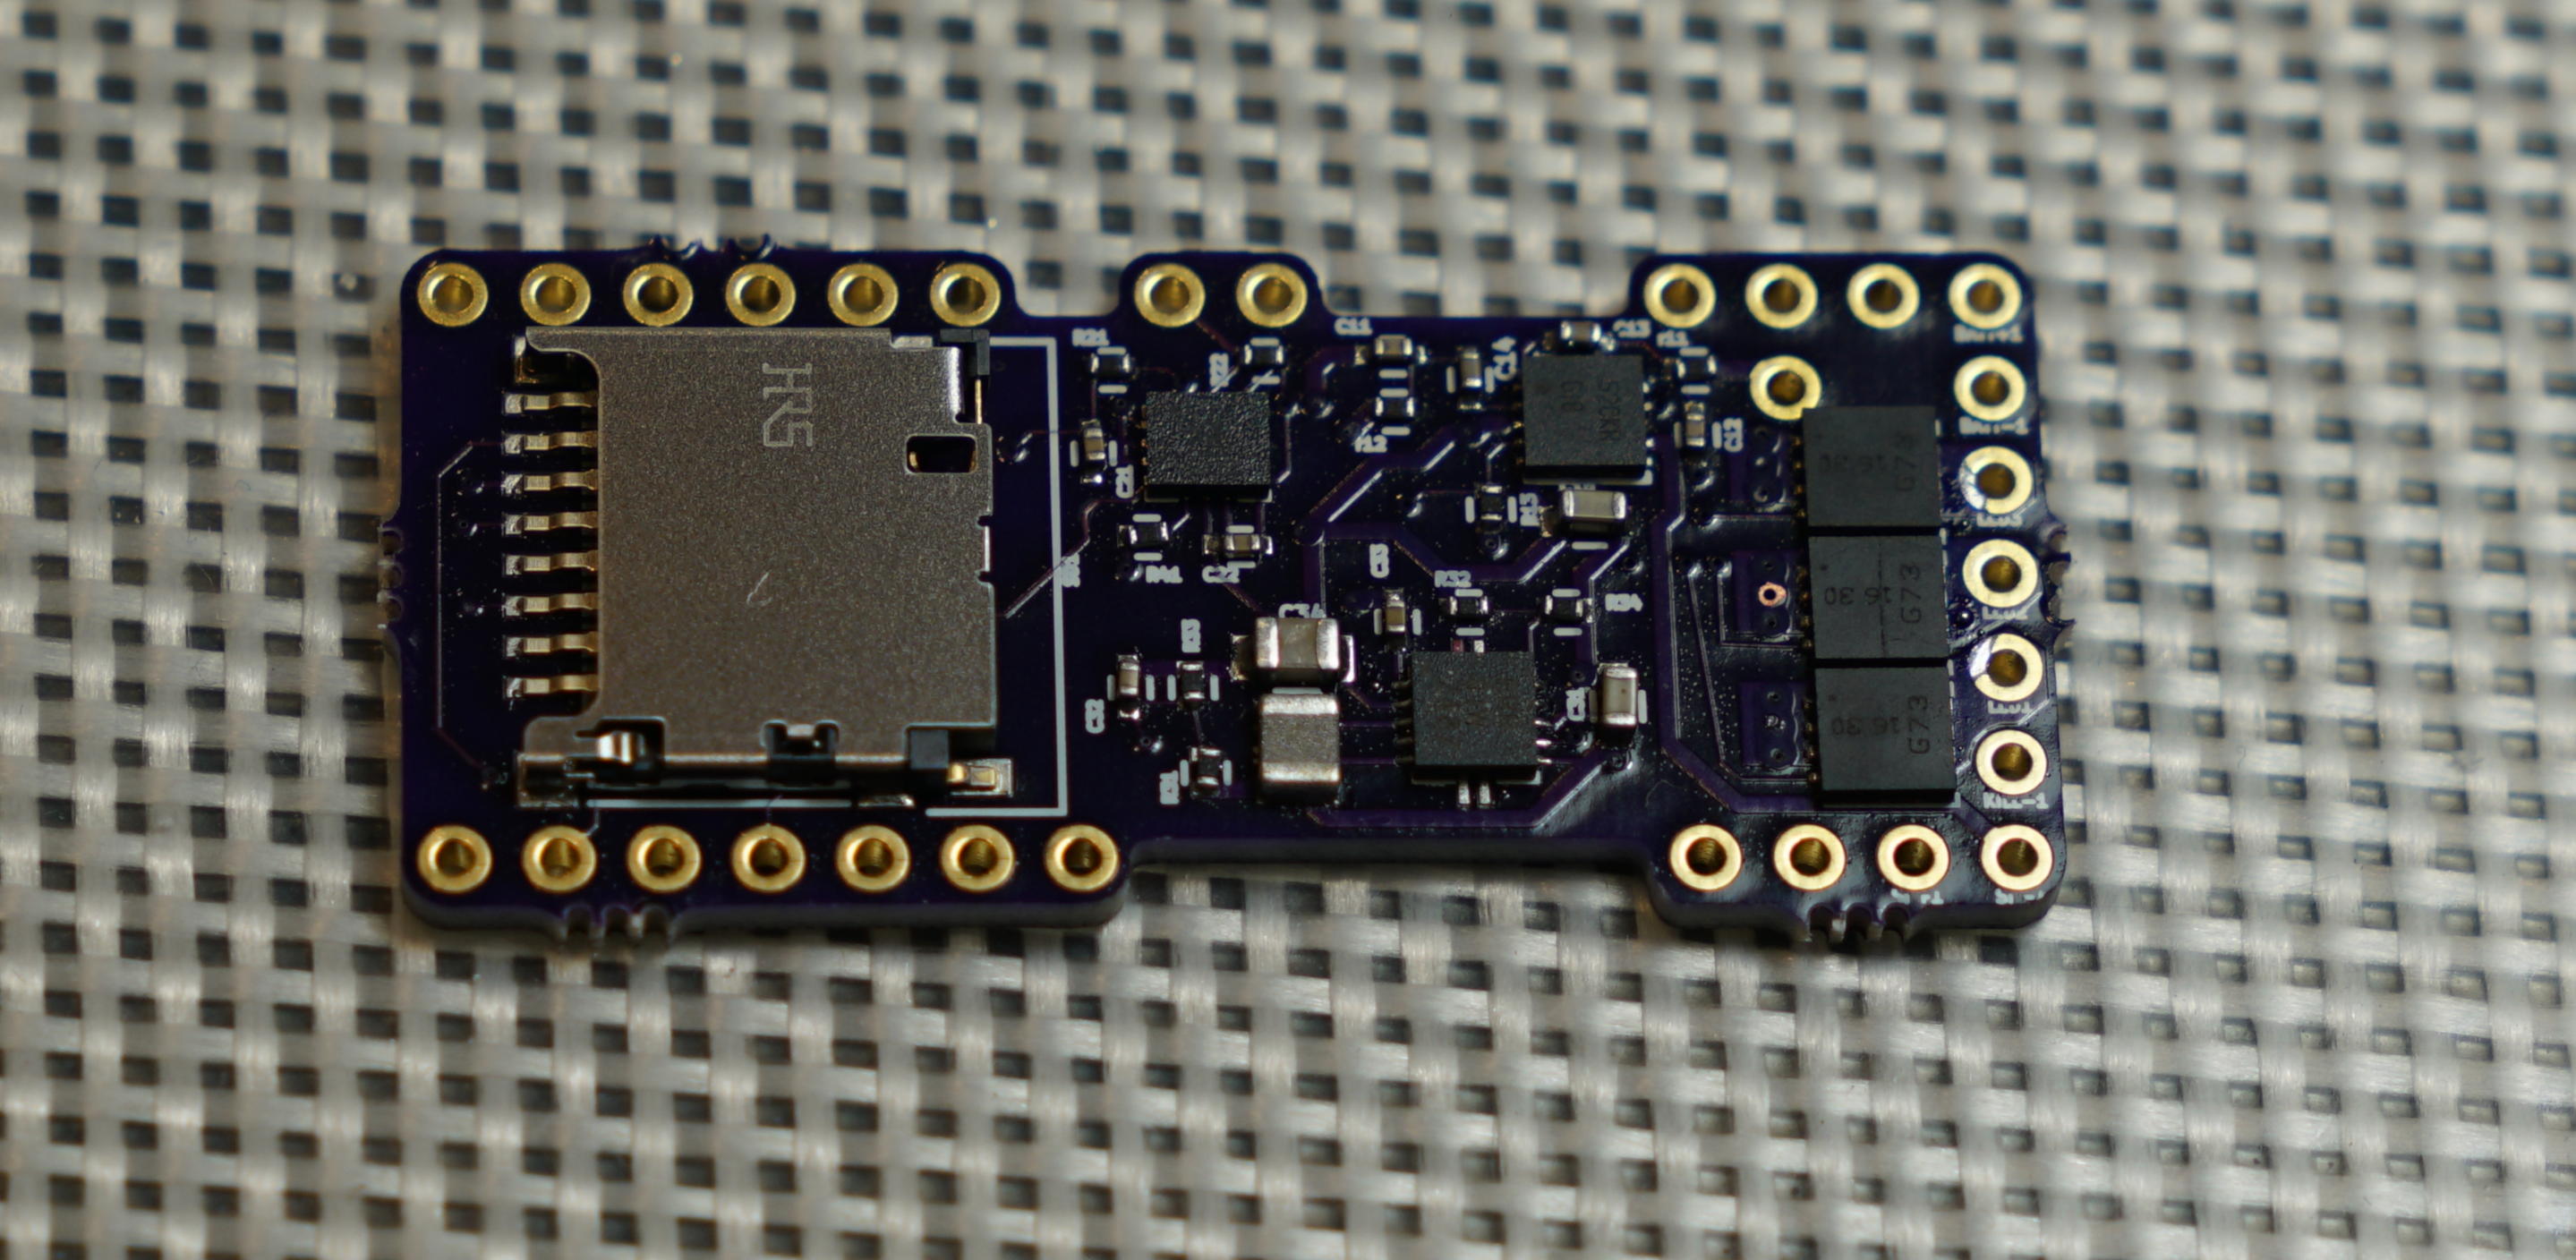
- 1 x TeensySaber V2.2 PCB - because DUH
- 1 x SD card holder - SD1
- 1 x IMU - U2
- 1 x Amplifier - U1
- 1 x voltage booster - IC3
- 3 x FETs - Q1, Q2, Q3
- 2 x 10 uF capacitors - C31, C15
- 1 x 22 uF capacitor - C34
- 2 x 3.3 nF capacitors - C11, C12
- 4 x 0.1 uF capacitors - C32, C33, C21, C22
- 2 x 1 uF capacitor - C13, C14
- 4 x 2.2k Resistors - R11, R12, R21, R22
- 1 x 100k Resistor - R13
- 2 x 2M Resistors - R31, R32
- 2 x 220k Resistors - R33, R34
- 1 x 10k Resistor - R41
- 1 x 4.7uH inductor - L1
- (optional) 1-3 x auxilary FETs - These can be placed on the bottom of the board to drive additional LEDs.
- Stencil - download the kicad files, export gerbers and upload to OSHStencils.
- Solder paste
- A reflow skillet
- A test rig - if you want to test the result without soldering.
Follow this handy guide for how to put everything together. Note that the markings on the board are not great for locating where to put the components, so I recommend printing out a component map and the list above, then cross things off as you go.
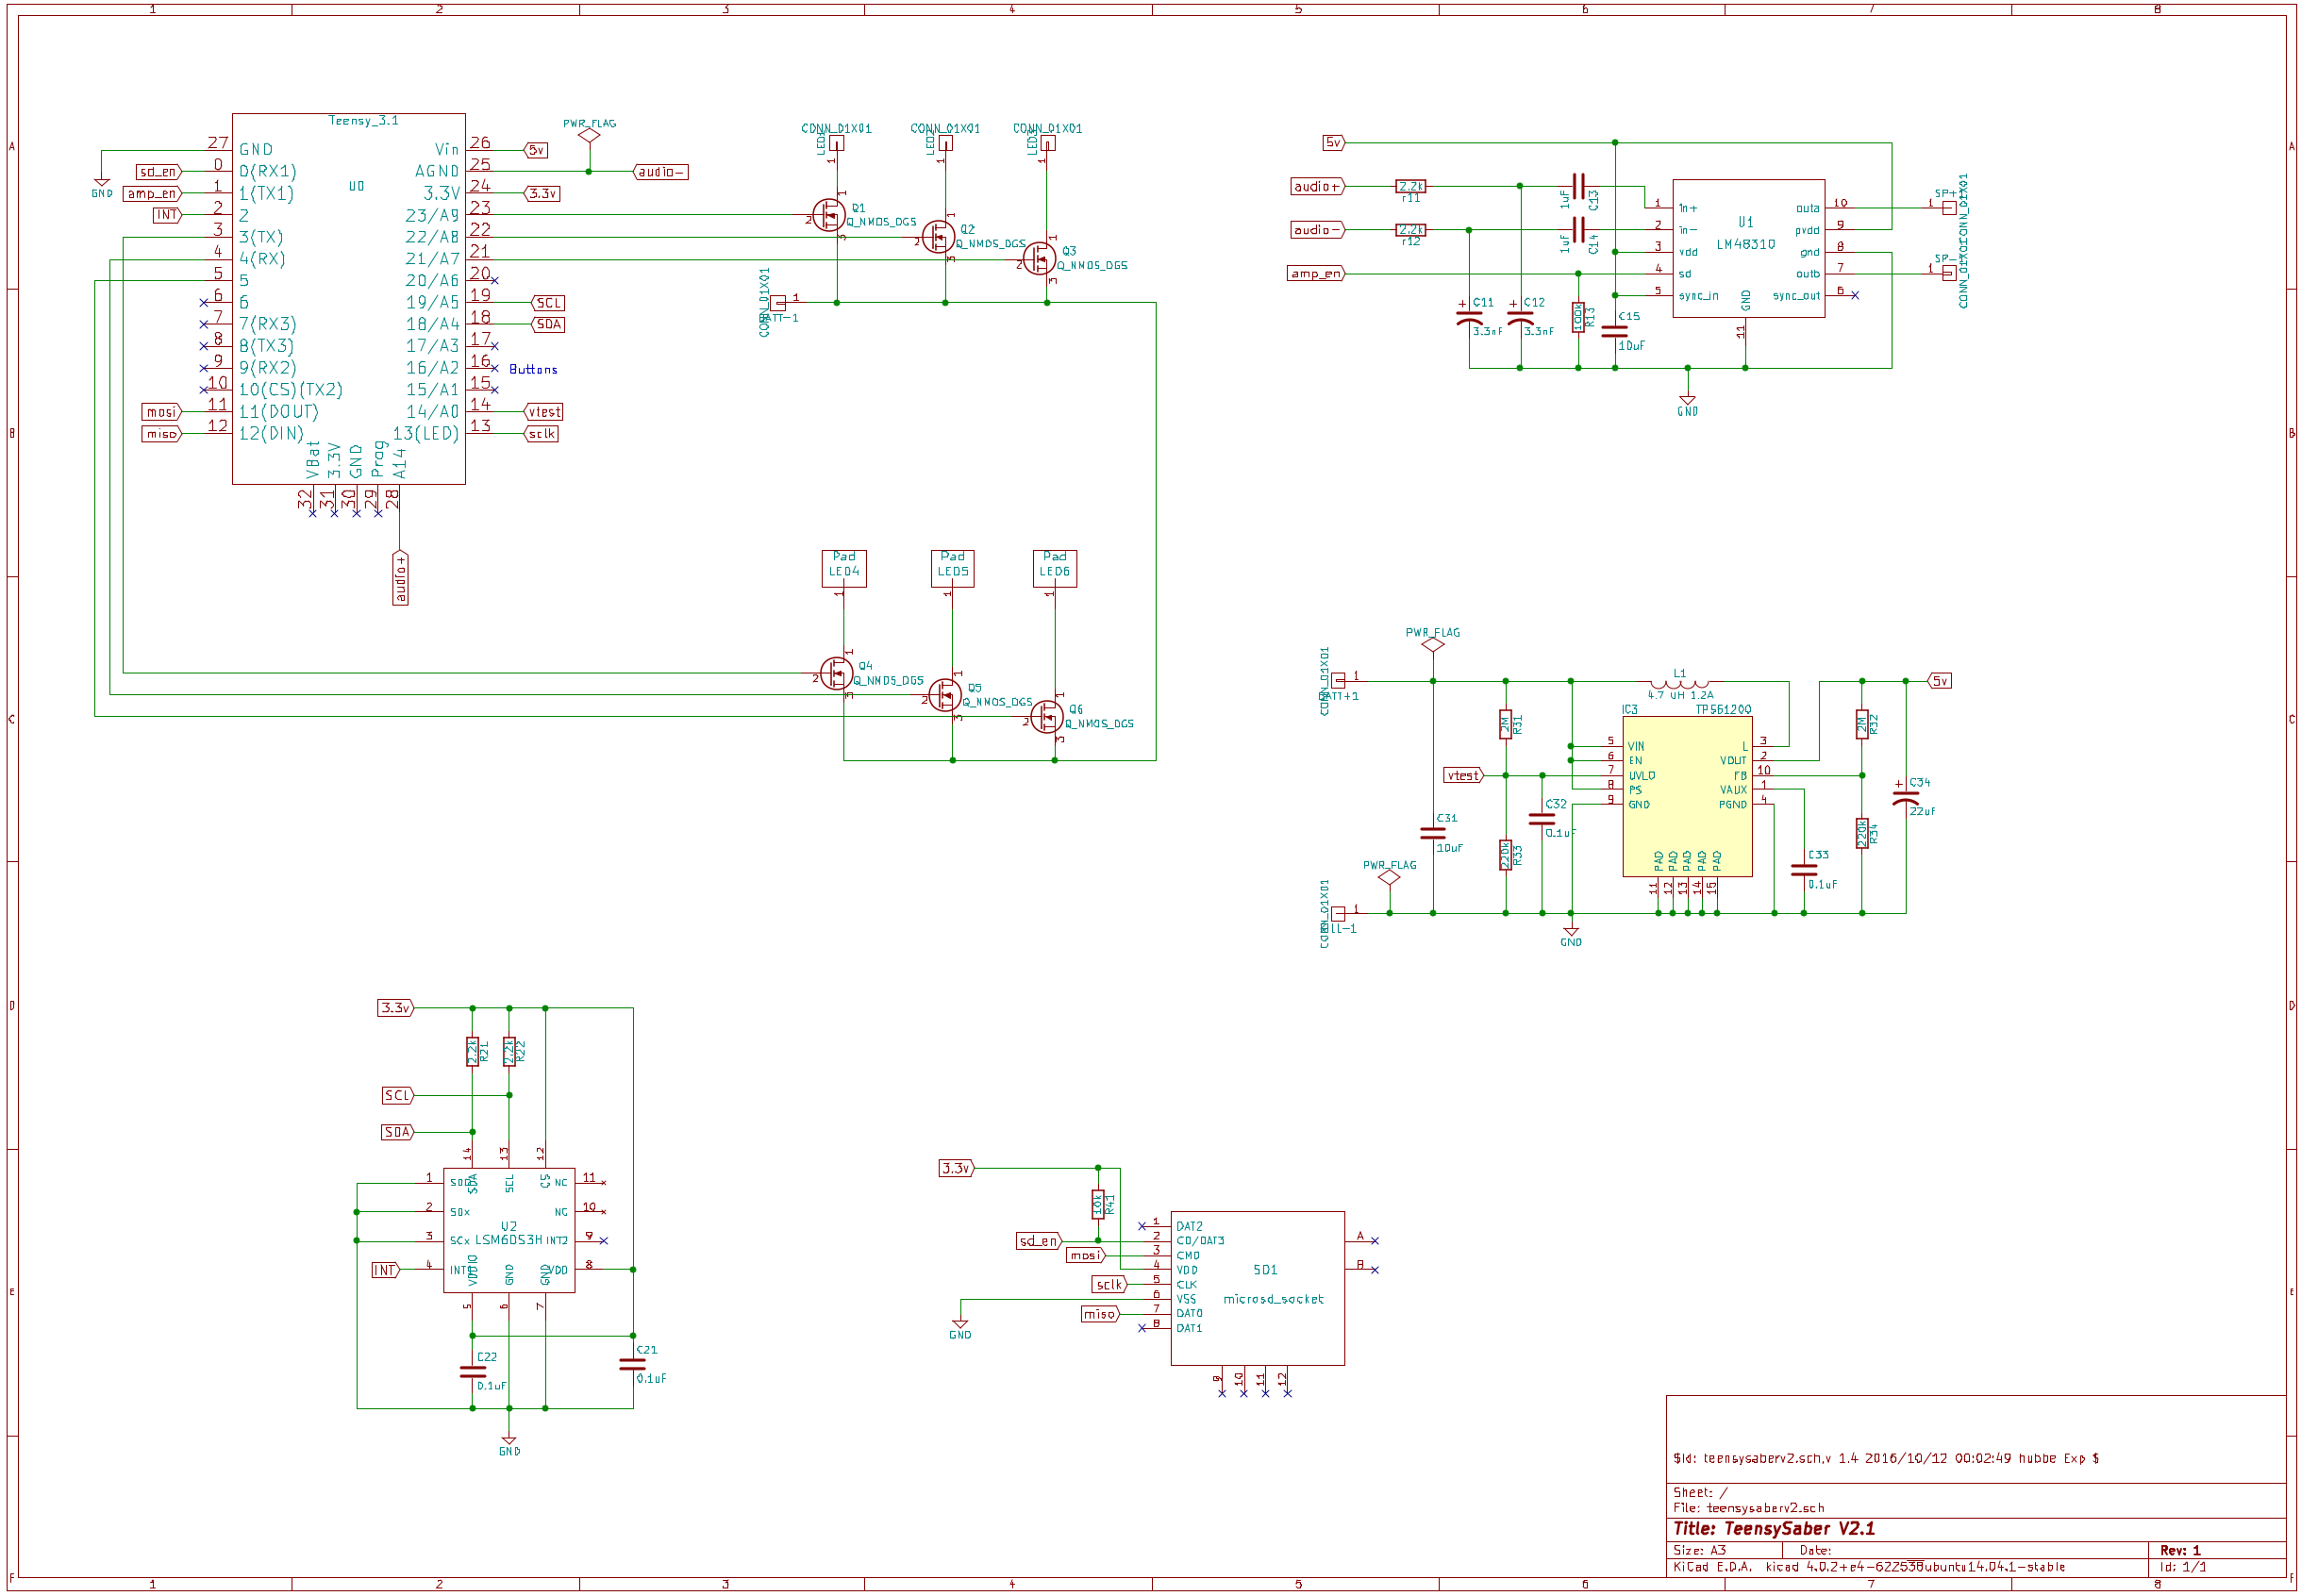
Schematic:

click on image for PDF
Problems? Questions? Suggestions? Check out The Crucible.
This page has been accessed 6,572 times since
February
11th,
2017.
Last modified:
March
29th,
2021
- Design by
Monica &
Fredrik
Hübinette
|
 |
 |
 |
 |


