 |
|
|
|

back
|
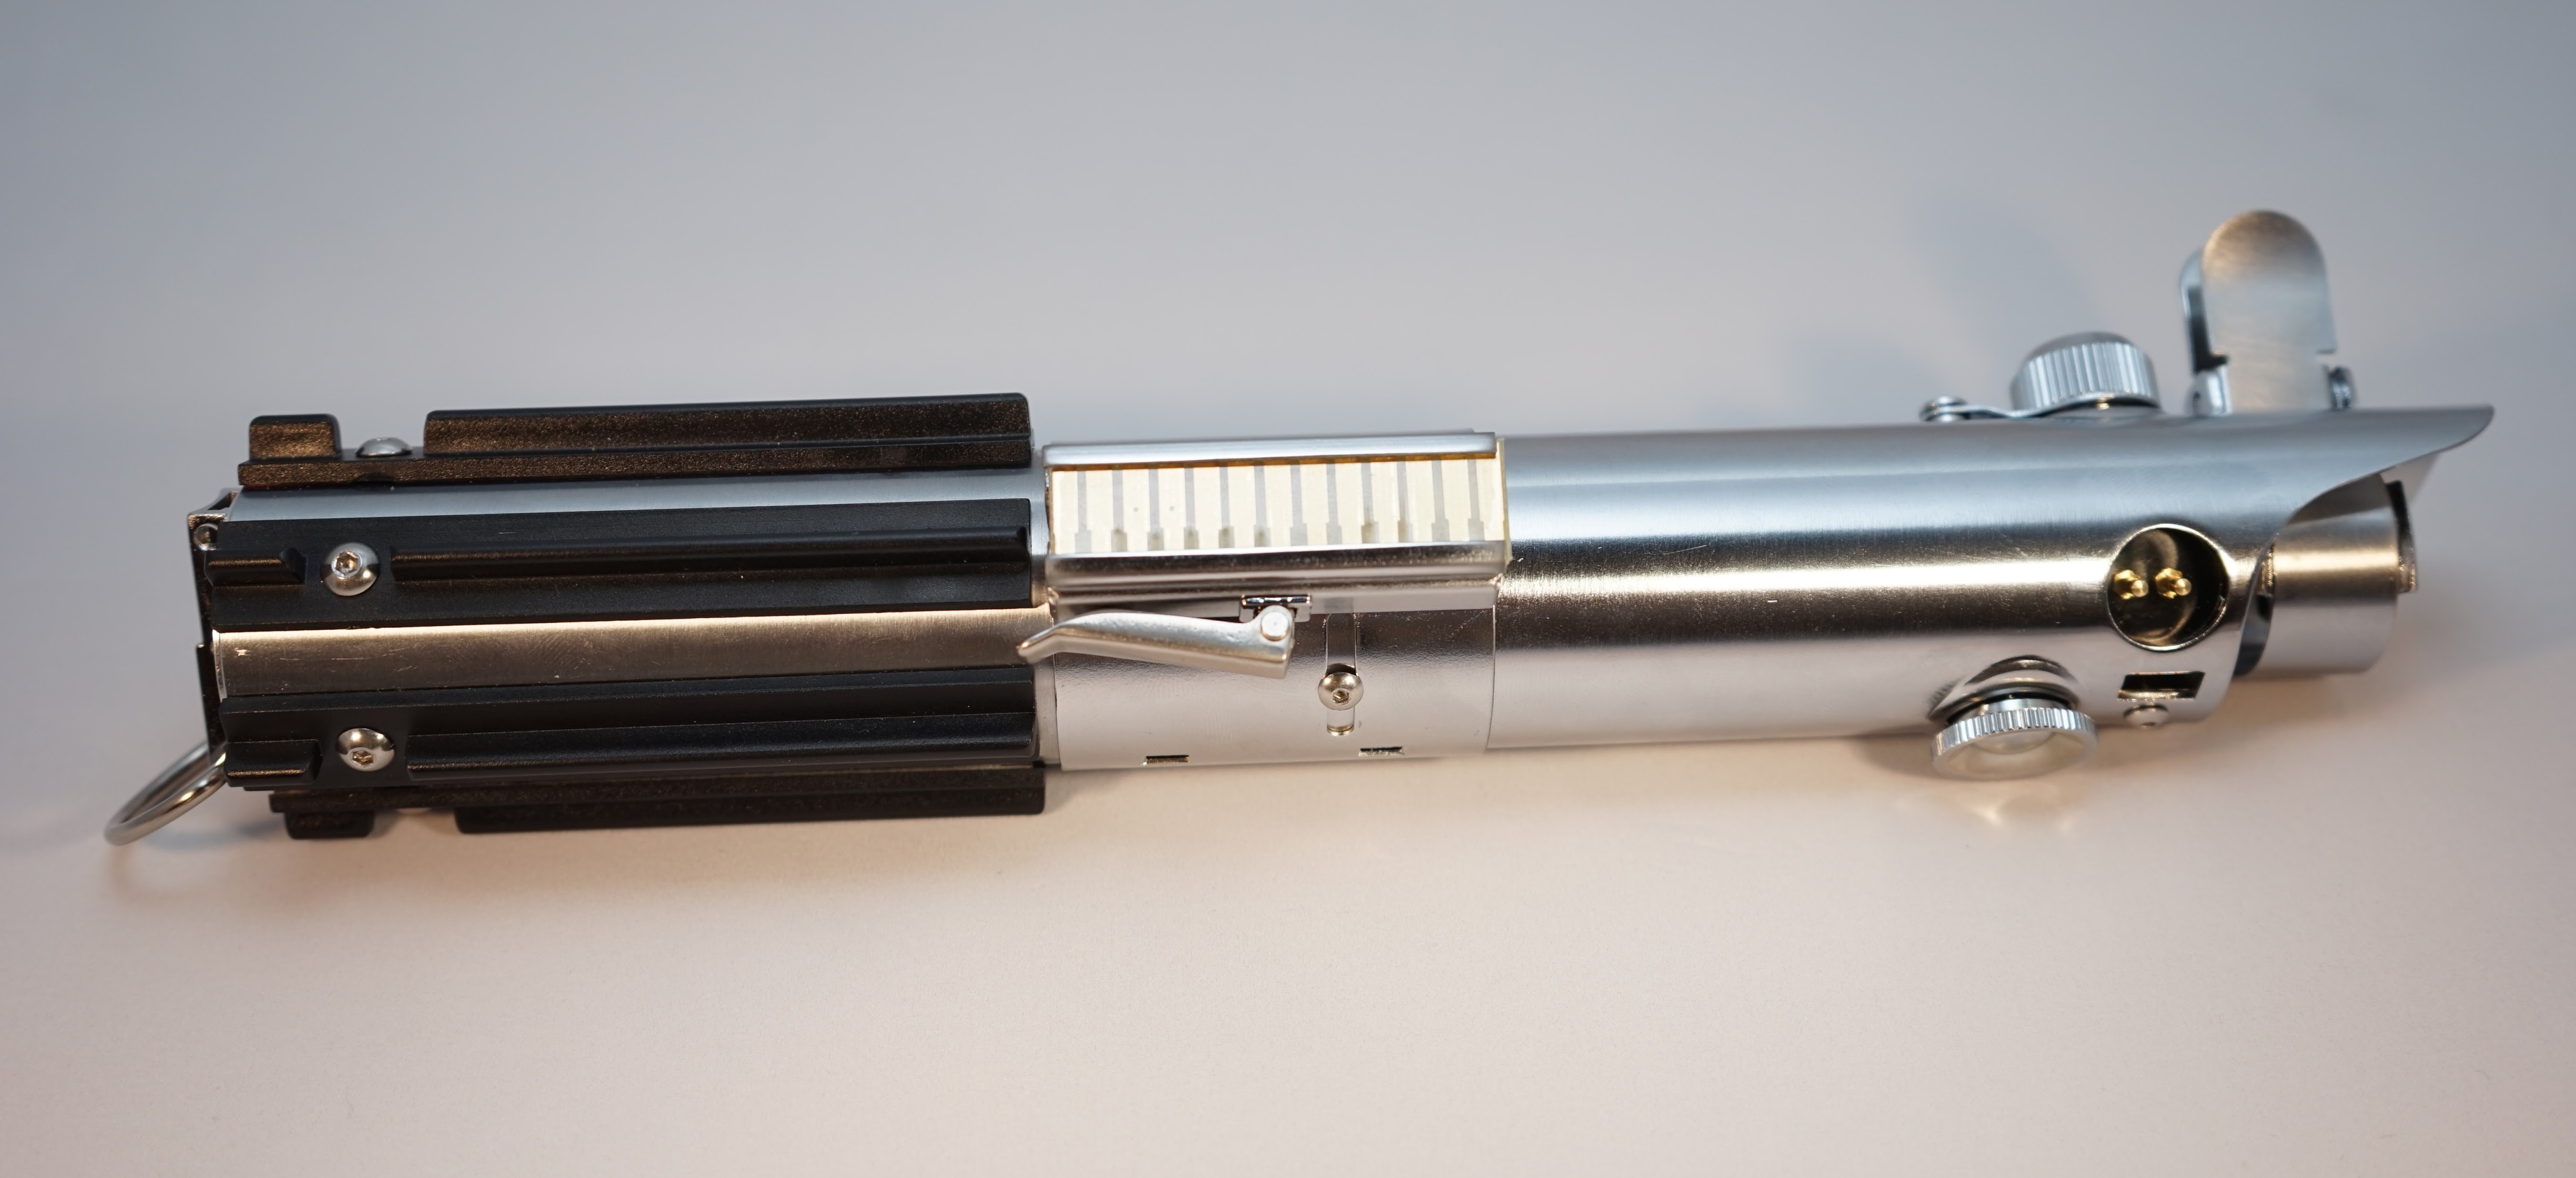
Teensy Saber Chassis & Hilt
|

|
DIY Teensy based lightsaber
 What you will need:
Putting it together
First, make sure you watch this excellent video tutorial to familiarize yourself with the Graflex 2.0.
We'll be using a different chassis and electronics, but it's important to know how to work the Graflex. If you have some other hilt, such as a real vintage graflex, contratulations, but
you're going to have to design your own chassis.
Obtaining a chassis
If you have access to a decent 3d printer, go here, download part 1, 2 and the
battery holder and print them out.
If you do not, you can order them printed from the same link, or if you like to have them printed in stronger
materials, you can get the parts from Shapeways instead.
I printed mine of a Form 2 printer, if you have one available, I recommend using the "tough" resin.
The touch button
For my light saber, I decided to use the circuit board clamp card, and wire it up as a touch button.
Note that "touch" is a bit of a misnomer, as you're not actually supposed to touch the copper parts
directly, as static electricity can potentially fry the teensy that way. The solution is simply, just
wrap the clamp card in some packing tape (after you solder a wire to the back of it). Of course, if you
prefer you can use switches in the clamp, as they do in the video tutorial above.
 The PJRC forum says that touch buttons works better if you connect the hilt to the ground of the
circuit one way or another, I did not do that, but it seems to work quite well anyway.
The PJRC forum says that touch buttons works better if you connect the hilt to the ground of the
circuit one way or another, I did not do that, but it seems to work quite well anyway.
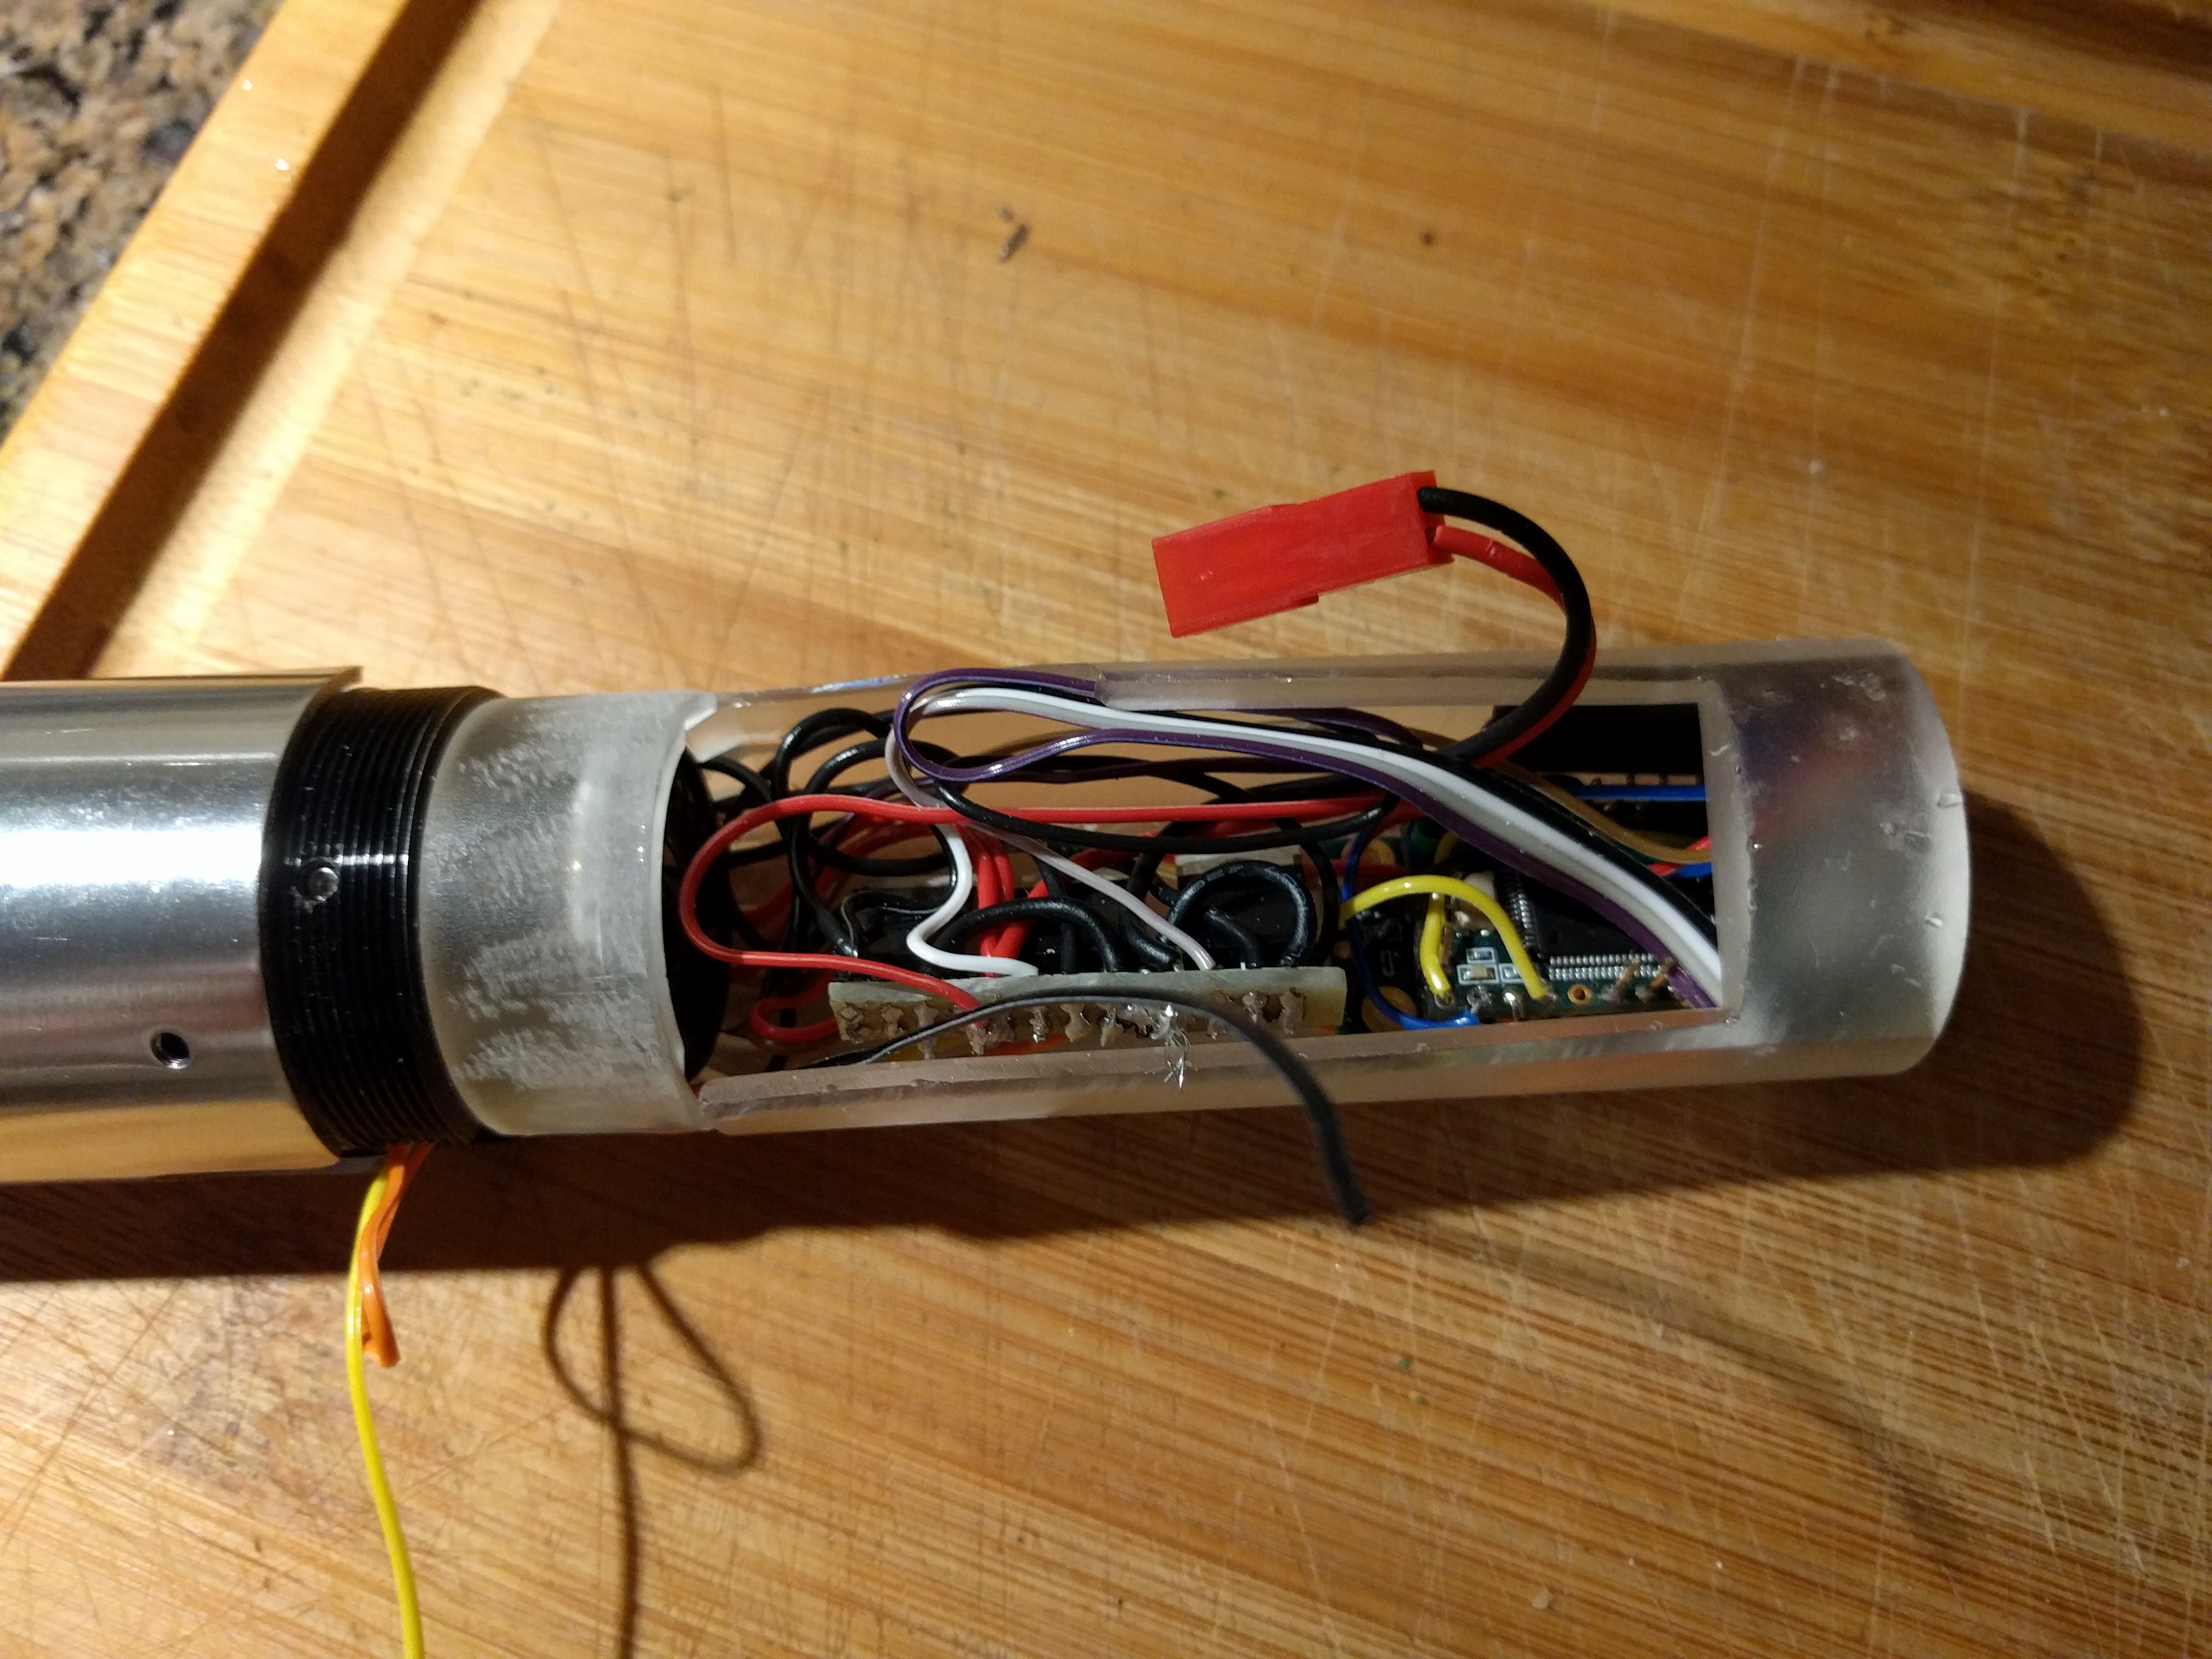
Stuffing
When it comes time to stuff the electonics into the chassis, it should end up looking something like this:
 A few things to note:
- The vent-like slots near the speaker are actually wire channels to let the wires go around the speaker to the blade
connector.
- The electronics is not actually anchored, once the battery is in place, the cables does the job.
- The sd card and usb slot is where the pommel will go.
- See the little notch at the base of the neck? Once you put the top piece on, you can use a rubber band to hold
the chasis together.
- The electronics stick out a little at the bottom, this is ok as there is a little space in the pommel itself for them.
You'll need to file or cut down the nobs that stick out from the grips on the inside of the graflex to fit
this chassis. I used a dremel with a sand paper bit, which was easy, but took a long time since I didn't want the screws
to get so hot that they melted the grip plastic.
Once you put the top piece on and insert it into the blade holder, it looks something like this:
 At this point, all you should need to do is to wire up your switches, plug the battery in, put the
battery holder into place and put the bottom part of the hilt back on, and you should be done with the hilt.
As you can see I broke off a piece of the chassis. It doesn't actually matter and it works just fine anyways,
but this is why I recommend getting the chassis printed in the strongest material you can.
At this point, all you should need to do is to wire up your switches, plug the battery in, put the
battery holder into place and put the bottom part of the hilt back on, and you should be done with the hilt.
As you can see I broke off a piece of the chassis. It doesn't actually matter and it works just fine anyways,
but this is why I recommend getting the chassis printed in the strongest material you can.
Problems? Questions? Suggestions? Check out The Crucible.
This page has been accessed 24,632 times since
July
25th,
2016.
Last modified:
March
29th,
2021
- Design by
Monica &
Fredrik
Hübinette
|
|
|
|
|