In most lightsaber blades, the two data lines are hooked up in parallel. In a zig-zag blade, the strips are hooked up in series. This makes each individual LED controllable, at the expense of frame rate. In a quad-blade, there are four strips, so the data goes up one strip, down another, up a third one and then down the fourth. In my quad-strip zig-zag blade there is a total of 529 LEDs. What you will need:
AssemblyAssembly is pretty straightforward. Prime the dowel and let it dry. Now figure out which led is doing to go on the top of the dowel and start gluing there. Make sure to align one side of the strip is aligned with the edge of the dowel, and when you go down the other side, you align the other side to the edge of the dowel. Then you do the same with the other strip, but on the other two sides. Now trim the strips, and solder wires to the pads. The data out of one of the strips should go to data in on the other. The other data in should come from the data pad on the blade PCB. All the + and - pads should attach to + and - pads on the blade PCB.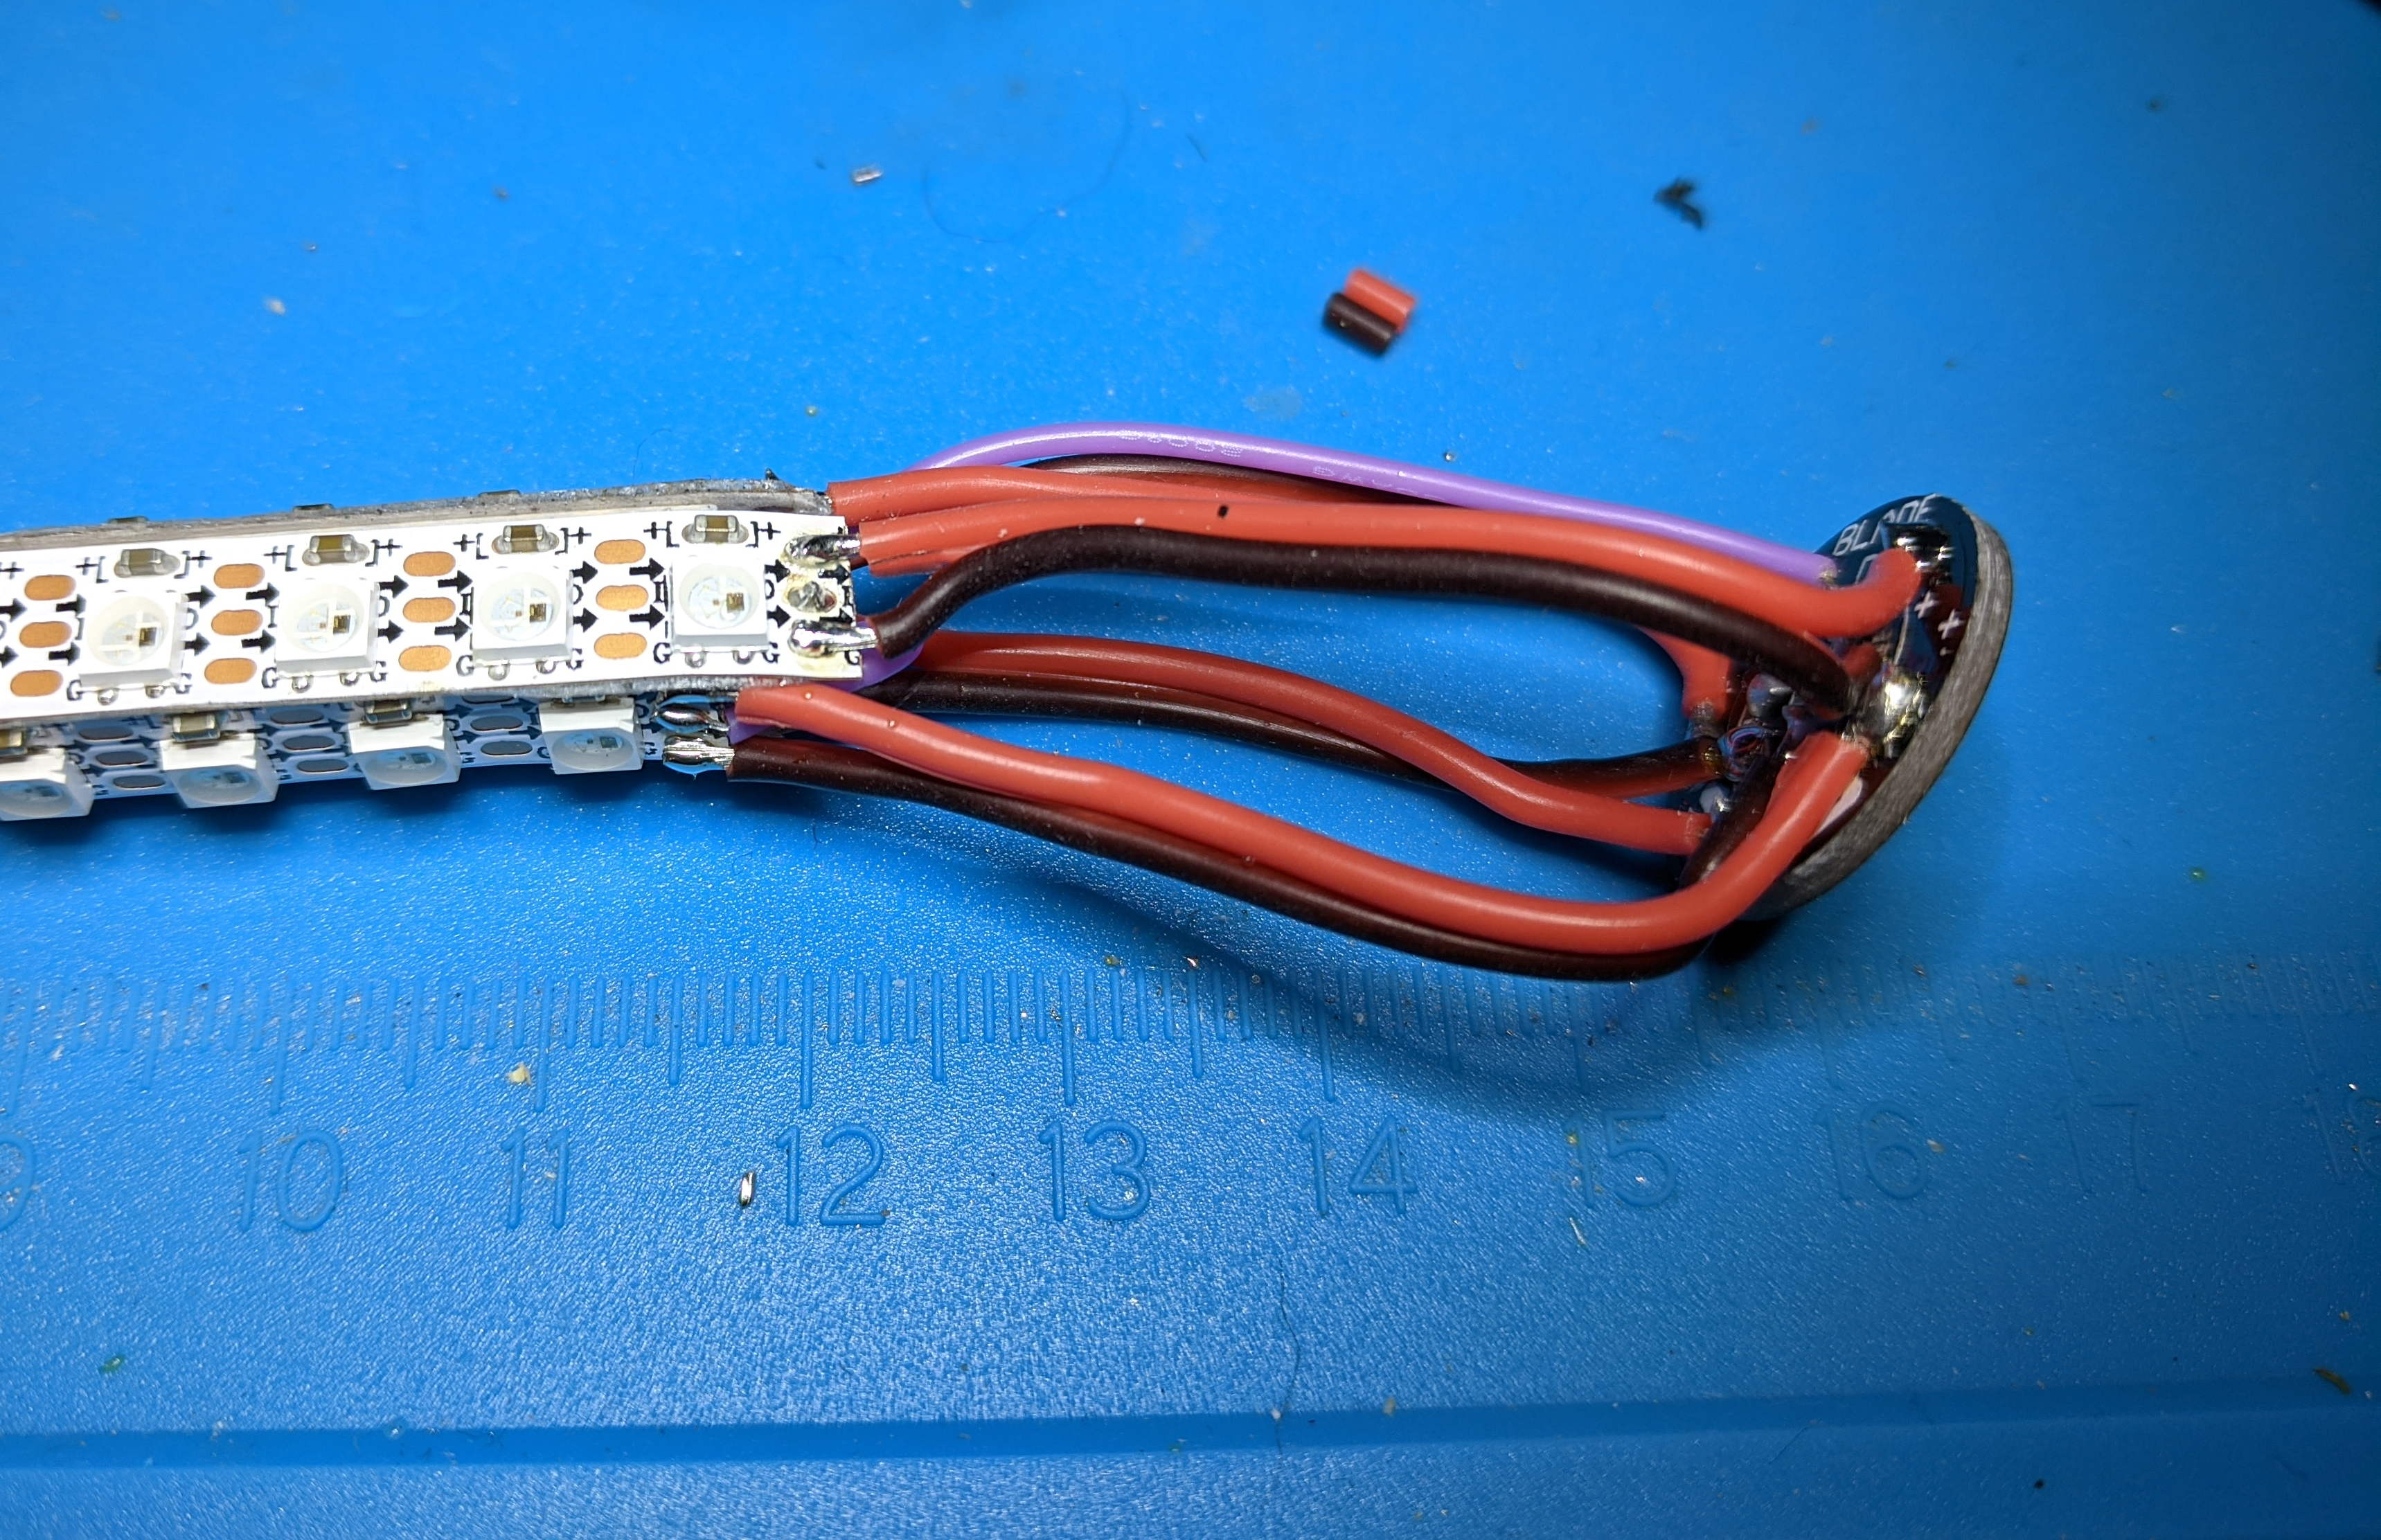 Problems? Questions? Suggestions? Check out The Crucible. Last modified: March 29th, 2021 - Design by Monica & Fredrik Hübinette |
|||||||||||
