 |
|
|
|

back
|
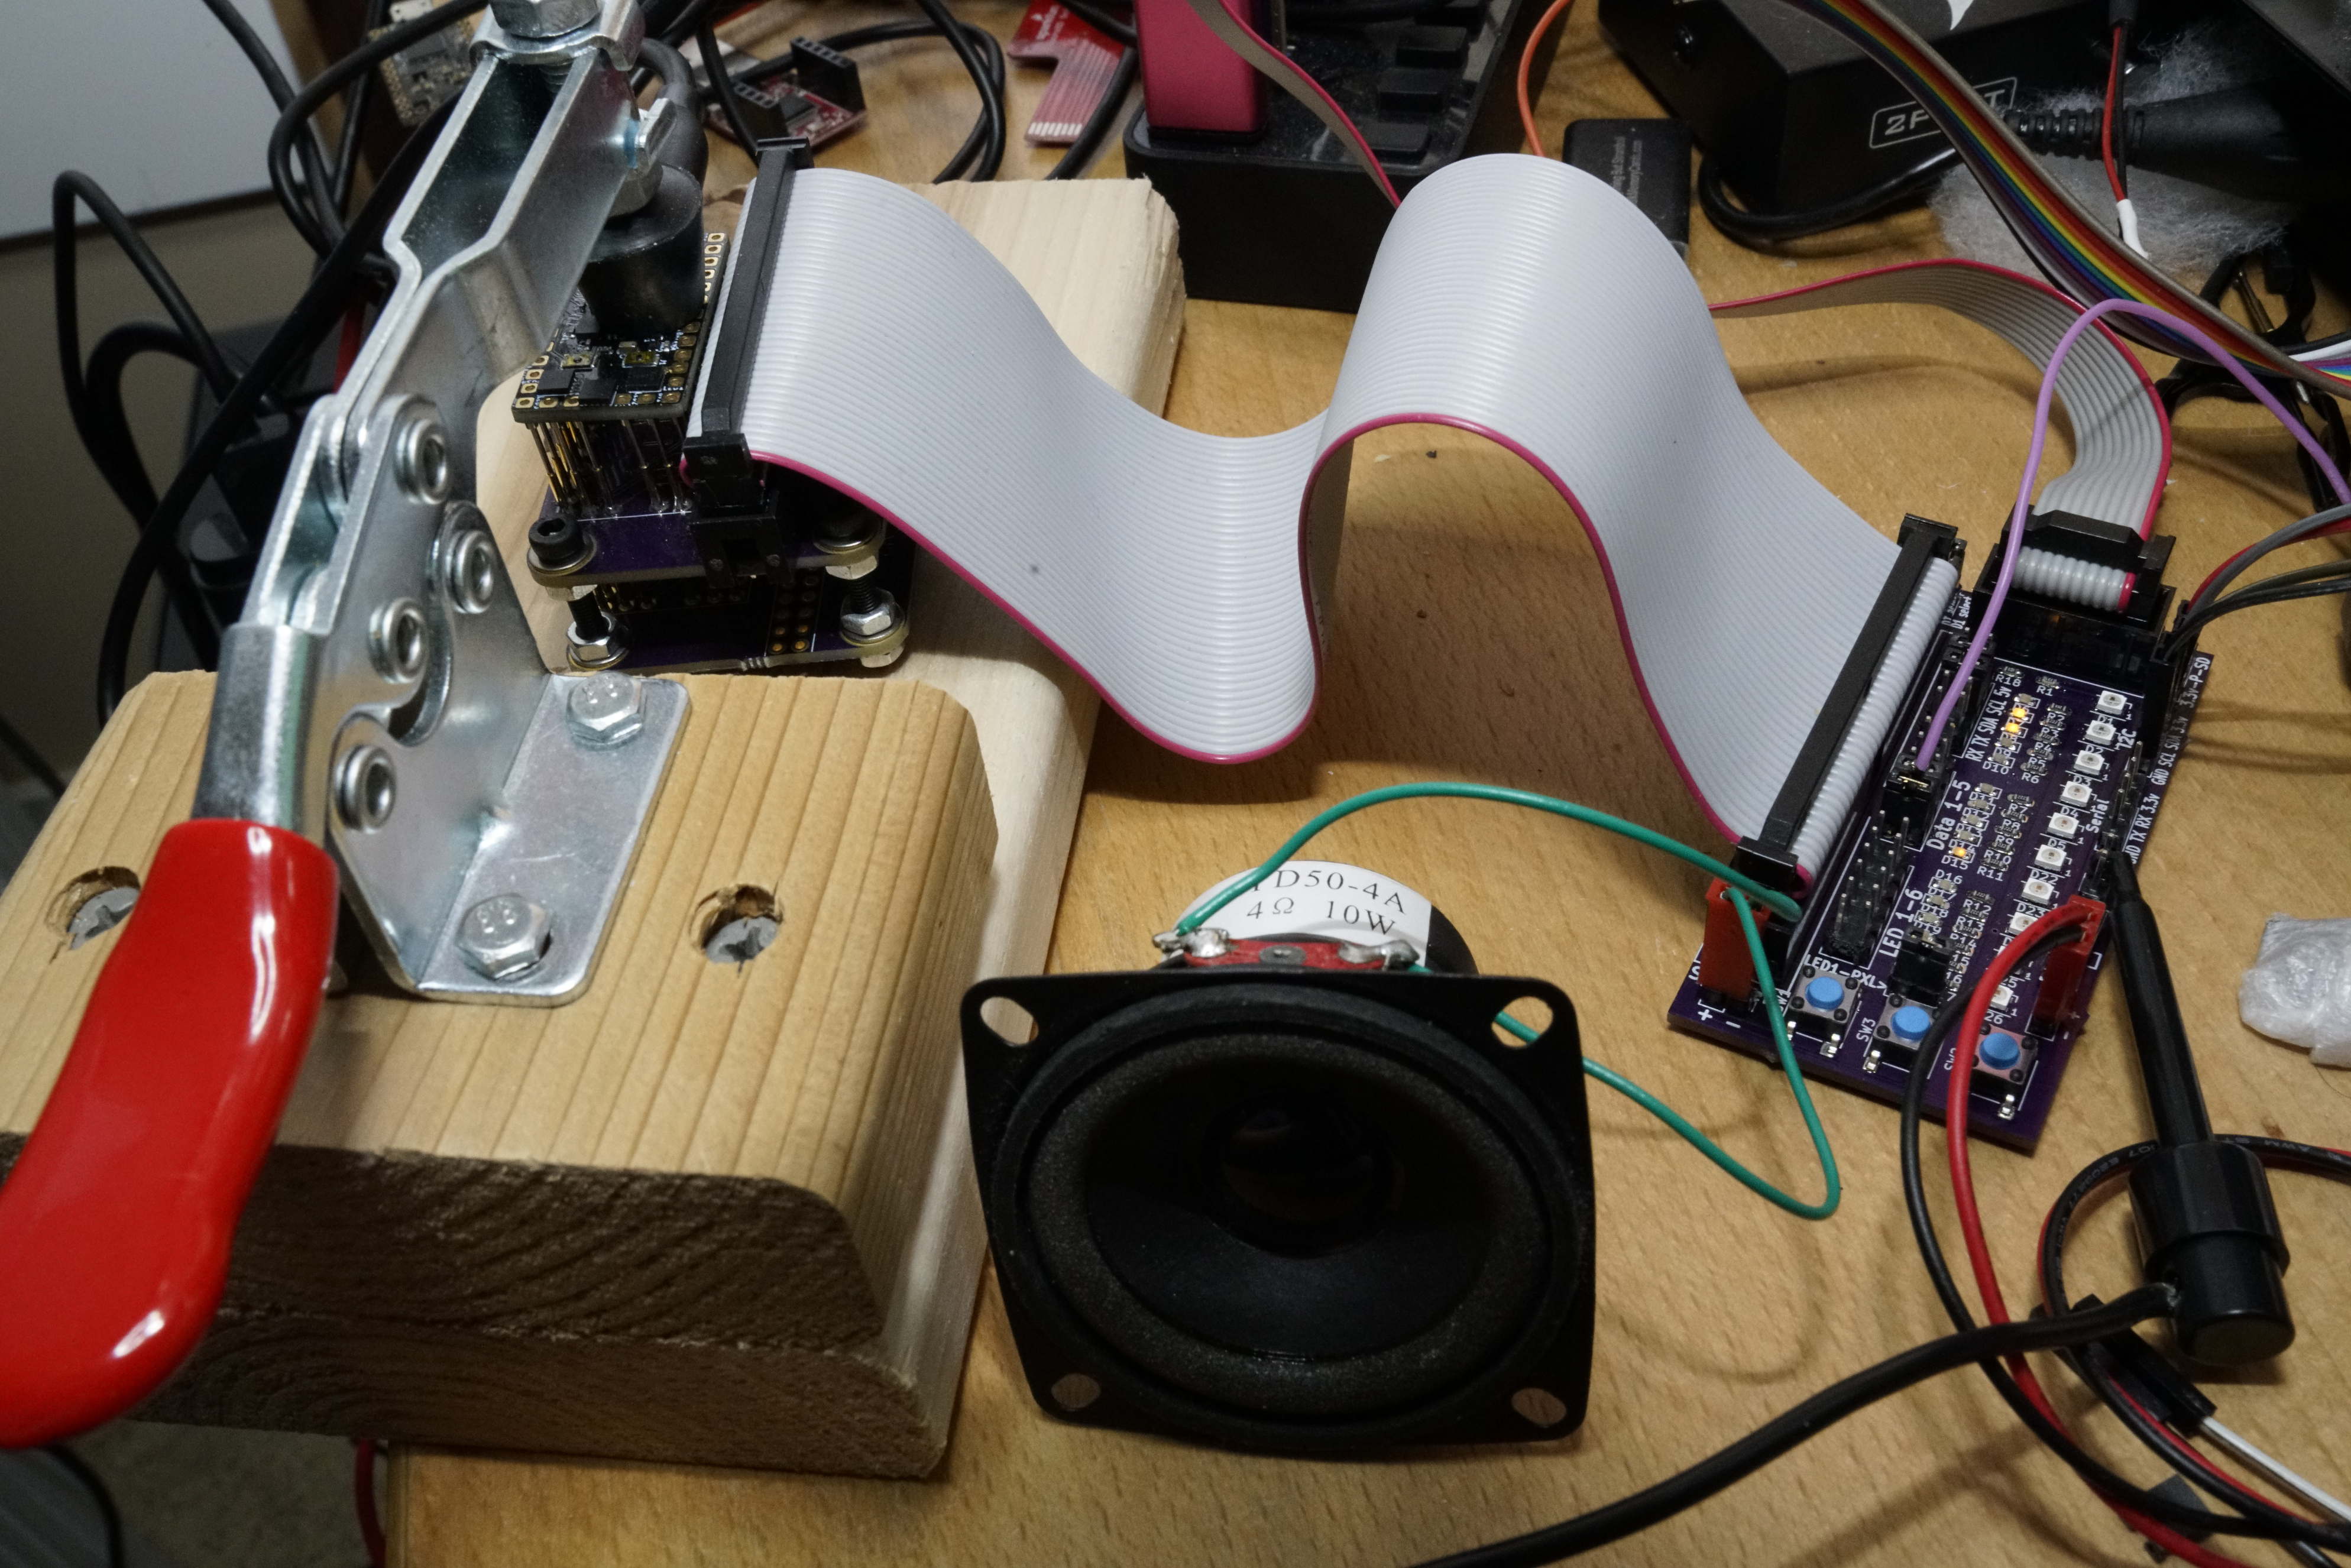
Proffieboard V1/V2 Test Rig
|

|
DIY Teensy based lightsaber
This is a breakout board that makes it easy to test a
Proffieboard without having to solder a bunch of wires to it.
With the right adapter, this test setup can be used to test and
prototype with both V1 and V2 boards.
Note that this test and prototype rig has several parts, each
with it's own we page.
 What you will need:
Assembly
Just hook up the right adapter to the breakout board.
Hook up power to one of the two power inputs.
(Make sure to check the polarity!)
Test procedure for Linux
Preparations:
- Make sure you have jumpers all down the middle of the tester.
- In D1 select, put jumpers on PU and PD.
- Plug in ST-Link V2, and hook up to the test rig.
- In one window, start up OpenOCD
- In a second window, run tail -f /var/log/kern.log
- Start up arduino and enable test script in lightsaber.ino
- Hook up a multimeter to test board and set it to beep on a short. Verify that this works!
Now, for each board:
- Insert SD, put board on test rig and plug in USB.
- Check that OpenOCD connects and that kernel window says STM32 bootloader
- press reset, make sure STM32 bootloader pops up again
- It should say LOW BATTERY repeatedly, no beeps
- Switch to battery power
- Press BOOT
- Press Power button
- Press AUX button
- Press AUX2 button
- verify that all LEDs light up in order
- verify that music is playing
- Switch back to short checking and turn off USB
Test procedure for Windows
Preparations:
- Plug in ST-Link V2, and hook up to the test rig.
- In D1 select, put jumpers on PU and PD.
- Download ST-link utility here: www.st.com/content/st_com/en/products/development-tools/software-development-tools/stm32-software-development-tools/stm32-programmers/stsw-link004.html
- Start ST-link utility
- Open up settings, go to "Bluetooth and other devices".
- Download a fresh copy of ProffieOS, unzip and click on ProffieOS.ino, which should open it in Arduino.
- Add // on line 25 to comment out the default_proffieboard_config.h
- Remove // on line 32 to use the proffieboard_v1_test_bench_config.h config file
- Go to line 1837 and change #if 0 to #if 1 to enable the proffieboard test script
- Hook up a multimeter to one of the power inputs. And set it to continuity testing. (Beep mode)
- Make sure that the power switch position is towards the power input hooked up to the multimetter Bridge the BATT+ and GND pogo pins and verify that the multimeter beeps.
- Plug in a li-ion battery or power supply to the other power input. Double check-polarity, or you will fry something.
- Plug in a speaker to the speaker pins.
- Prepare an SD card by putting a mono, 44100 WAV file in "tracks\cantina.wav"
For each board:
- Insert SD, put board on test rig, lower lever
- If there is a beep from the multimeter, it means that there is a short on the board, and throwing the power switch will probably melt something....
- Plug in USB cable
- Check the "bluetooth and other devices" window, the board should show up as STM32 BOOTLOADER if it's never been programmed before. If it has been programmed it should show up as "Proffieboard".
- Press "connect" in the ST-link utility, make sure it connects successfully. (Should say "Device family : STM32L4x3" near the bottom.)
- Press reset, watch "bluetooth and other devices" and make sure the board disconnects and connects again.
- Hit "upload" in arduino. Wait for the program to upload and restart the board.
- It should now show up in "bluetooth and other devices" as a Proffieboard
- The speaker should start saying "LOW BATTERY", repeatedly, possibly with a lot of distortion.
- Move the power switch over.
- Press the BOOT button. (on the board itself)
- Press Power button (on tester)
- Press AUX button (on tester)
- Press AUX2 button (on tester)
- Verify that the yellow LEDs light up in order
- Verify that music is playing and sounds reasonable.
- Switch power switch back!!!
- Disconnect USB, raise lever, take out SD card
Problems? Questions? Suggestions? Check out The Crucible.
This page has been accessed 9,231 times since
October
20th,
2019.
Last modified:
March
29th,
2021
- Design by
Monica &
Fredrik
Hübinette
|
|
|
|
|